
Introduction
In this article, I will explain how to do an automated MySQL database backup on Ubuntu. If you have ever used DigitalOcean ****you probably know that they already have a backup system on their droplet management website, however, it’s not quite practical:
- The only available option is weekly backups
- It costs
$2.00/monthper droplet
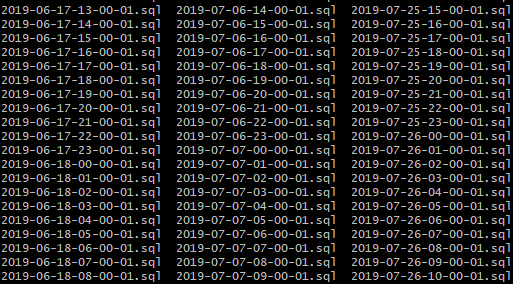
For example, if you have a financial startup and you have hundreds of new transactions every day it’s a must to have hourly MySQL database backups in case of unplanned emergencies. Let’s see how we can do that using bash.
Before diving in I have short notice. Even though I am talking about DigitalOcean it’s not important whether you are using it or not. You can replicate this on other VPS providers as long as you have Ubuntu, working MySQL server and SSH access. This tutorial would probably work on older Ubuntu versions, too.
Install the MySQL server
I won’t talk about this in detail, because there are already a ton of tutorials on the internet on how to do this. MySQL database is usually installed together with the stack that you are planning to use. In this tutorial, I am using the LAMP stack, but it will work with other stacks as well.
The easiest way is to start is to use DigitalOcean’s one-click marketplace, there you can install your preferred stack in 5 minutes. However, if you prefer doing the LAMP stack yourself this would be an excellent guide to start.
Doing the MySQL database backup manually
The easiest way to export database is by using mysqldump tool. If you had set up your stack then you should already have this tool in your system.
The syntax is easy – mysqldump $database_name > $directory. After executing this command the mysqldump tool will make MySQL database copy and save it inside your preferred directory. However, make sure to be logged in as a root user before executing this command.
Writing bash/shell script
To make our bash script available globally throughout the system, we will create it inside the /bin directory. The bash script that we are writing will make a MySQL database copy and save it to a file that will be named like this: 2019-05-11-17-00-00.sql.
You can get to /bin directory using the cd command.
cd /binInside this directory, we will create a new file called backup-db using your favorite editor. I prefer to use nano editor, but you can use anything you like (vim, vi).
nano backup-dbEvery bash script starts with !/bin/bash, so write it out on the first line.
!/bin/bashThe second line will have our date variable that will get the current time.
d=`date +%F-%H-%M-%S`The third line will call the mysqldump tool and save the file inside /home/victor/backups/database directory with the file name of $d variable. After this save the file, it’s time to set up the CRON, which will execute this bash script every hour. The full bash script can be found here.
mysqldump victorlava > /home/victor/backups/database/$d.sqlSetting up CRON
CRON stands for a time-based job scheduler in UNIX like systems. We can access the CRON using the command below.
crontab -eThis will open the CRON tab file where we will need to add this line of code at the bottom of the file.
0 * * * * /bin/backup-db
This will execute the /bin/backup-db bash script every hour. If you are looking for a custom time you can use one of the CRON generators. If you are looking for a more detail explanation on how CRON works take a look here.
Conclusion
This is a more practical way to make a MySQL database backup because you have much more control over what database you want to export and how often you want to do that. The best thing about this approach is that it doesn’t cost you an extra $2.00/month. Also, it’s possible to make multiple database backups from other remote servers with a little bit of fine-tuning your bash script.
However, the only issue is that DigitalOcean’s VPS servers don’t offer a lot of disk space, so it will get full quite fast. One of the solutions would be to upgrade our bash script that it would delete the old backups. The other potential solution would be to put your backups in the cloud, for example, Google Drive, which would be a much better long term solution.
In the next tutorial I will show how to put your database backups in the Google Drive for free, so stay tuned and subscribe to my weekly newsletter.
If you liked this hack share and if you would like to see a video version of this tutorial then comment on the section below.